
.svg)
Introduction
Running a Shopify store means juggling countless details, from optimizing checkout flow to refining product pages and marketing campaigns. But your blog layout also impacts how professional and cohesive your brand looks.
By default, Shopify blogs display the author’s name on every post. While this helps build credibility, many store owners prefer to remove the author name to keep their brand voice consistent or hide freelance and guest contributors.
Before diving into code edits, note that some themes (like Debut or Minimal) allow you to hide the author name directly from the theme settings. If yours doesn’t, don’t worry, this guide walks you step-by-step through how to remove the author from your Shopify blog safely and effectively.
And just to clarify: removing the author won’t hurt your SEO rankings. Google cares more about content quality and expertise than bylines, so as long as your post provides value, your SEO performance remains strong.
Why trust us?
- We created Bloggle, a simple yet powerful Shopify blog builder to overcome the limitations of native Shopify blogging
- Used by 2000+ merchants across 60 countries worldwide
- Merchants love us - 4.9/5 rating on the app store
- 55000+ blogs written using our easy-to-use app
Users report up to a 10x boost in SEO traffic and revenue under our guidance.
Why you might want to remove an author from your Shopify blog
By default, most blogs come with a byline, which tells the reader who has written the blog post. It humanizes the brand. But if a blog is co-authored by multiple authors, it might not be elegant to include each and every author's name in the byline. Or you may be working with external freelance content writers or guest bloggers who contribute sporadically or on a one-off basis. You might want to remove the author’s name in this case to keep the voice consistent and maintain familiarity with the readers.
There are several reasons why Shopify merchants choose to hide or remove author names:
- Keep your brand voice consistent: When multiple team members or freelancers contribute, displaying individual names can make your blog feel disjointed.
- Simplify guest contributions: If you occasionally publish guest posts or outsource writing, removing the author line helps keep your blog uniform.
- Protect privacy: Some teams prefer to keep contributors anonymous for privacy or brand control reasons.
- Maintain a clean design: Minimalist or product-focused stores often hide metadata like authors to keep the layout visually balanced.
Keep in mind that once you remove the author, this change will apply sitewide, ensuring a uniform look across every blog post.
A step-by-step tutorial on how to remove author from Shopify blog
Depending on your Shopify theme, there are two main methods to remove the author name, one for sectioned themes and one for non-sectioned themes.
For sectioned themes
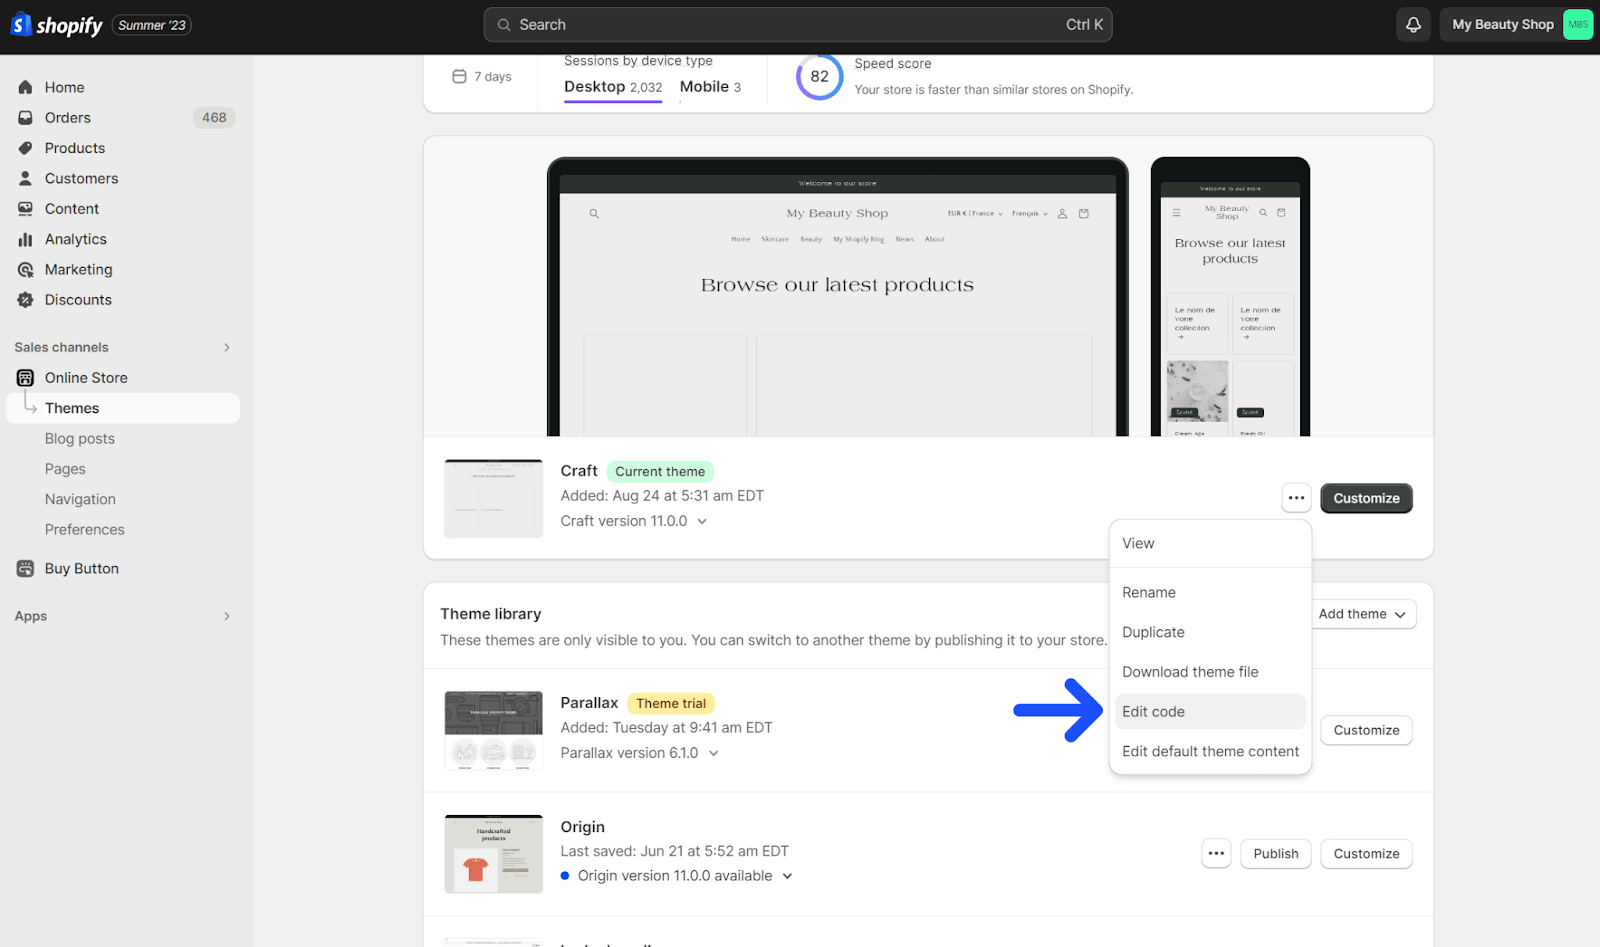
- From your Shopify admin, go to Online Store → Themes.
- Find your active theme and click Actions → Edit code.
- Under the Templates folder, open
blog.liquid. - Search (
Ctrl + ForCmd + F) for{{ article.author }}and delete this tag. - Save your changes.
- Go to the Sections folder and open
article-template.liquid(orarticle.liquidfor Boundless). - Again, search for
{{ article.author }}and delete it. - Click Save, then preview your blog to confirm the author name is gone.
Tip: If you only want to remove the author but keep the date, replace {{ 'blogs.article.author_on_date_html' | t: author: author, date: date }} with {{ date }} instead.
For non-sectioned themes
- Go to Online Store → Themes → Actions → Edit code.
- Open
blog.liquidunder the Templates folder. - Find and delete
{{ article.author }}. - Open
article.liquidand repeat the same step. - Save changes and refresh your storefront to confirm the update.
Optional check: Before editing code, some themes let you disable author display directly from the theme settings panel, a quicker alternative if available.
Limitations of Shopify and the Solution
Though Shopify is a powerful platform, it's not without its restrictions, especially when it comes to managing blog authors. As you saw, removing authors is cumbersome. Shopify doesn't offer a simple way to remove authors from individual blog posts without deleting them from the database entirely. This makes it difficult to manage guest authors or one-off contributions.
Shopify’s blogging system doesn’t offer a built-in toggle to hide authors on specific posts, meaning your change applies globally across all articles.
If you ever want to restore author names, you’ll need to manually reinsert the Liquid tag or duplicate your theme before editing.
Additionally, theme updates can override manual edits, so always back up your theme or duplicate it before making any changes.
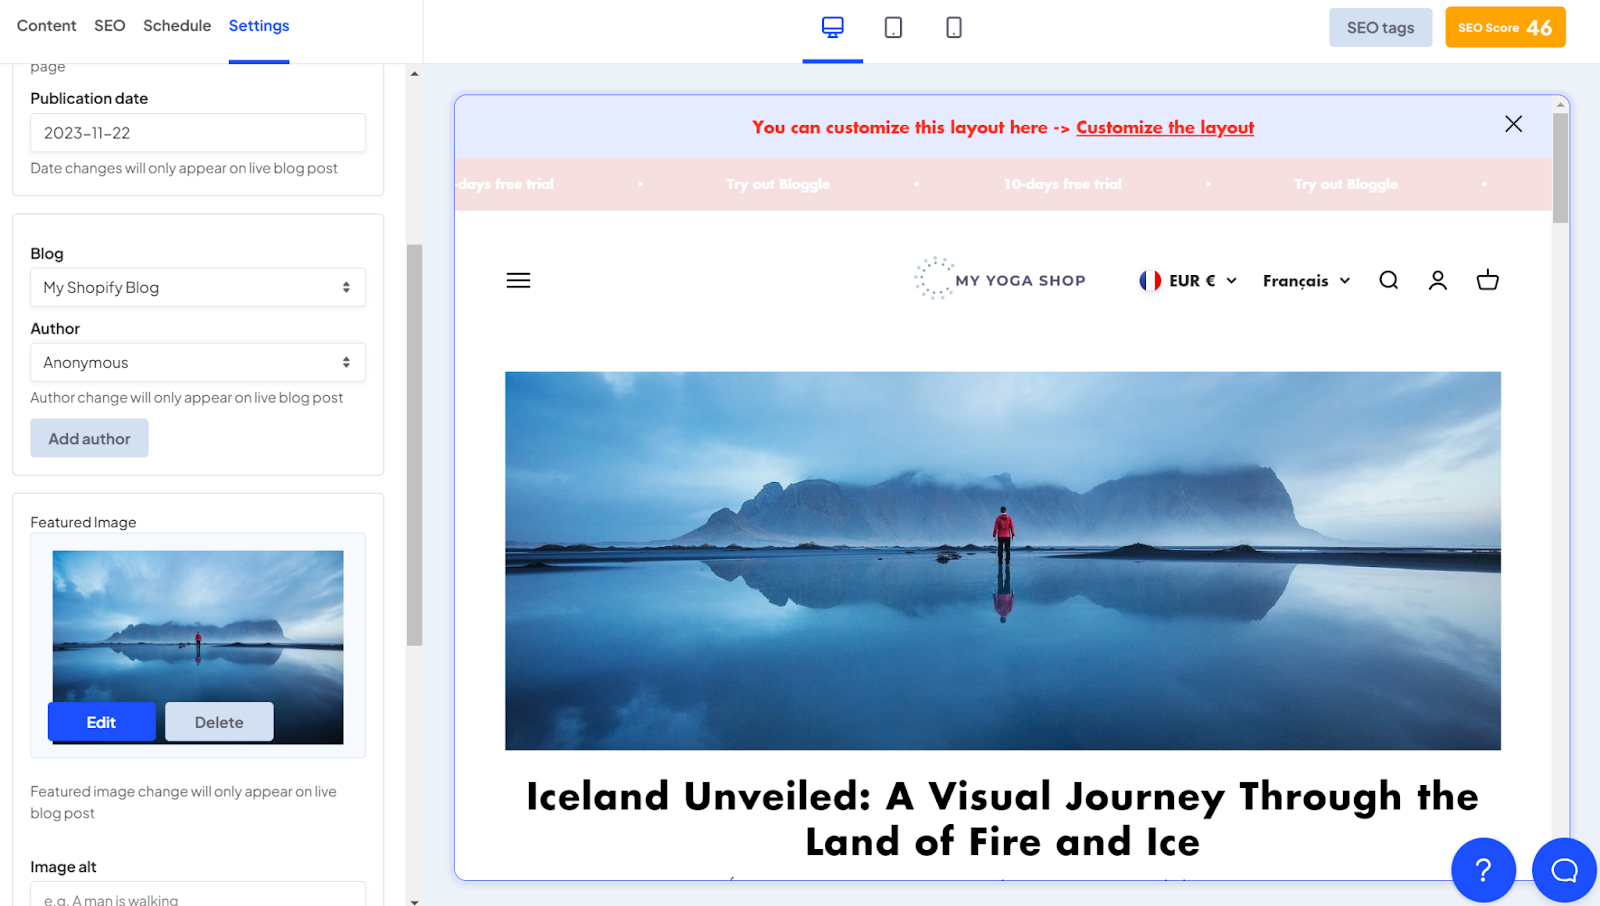
If you’d like a simpler way to manage authors, Bloggle offers full flexibility: add, hide, or rename authors per post without touching code. You can even create an “Anonymous” author profile to keep your content clean and consistent.
Solution: Bloggle
Enter Bloggle, a Shopify app designed to address these limitations. With Bloggle and other plugins, you can add unlimited authors, easily remove or replace them on individual posts, and even feature guest authors without adding them to your staff accounts. You can also keep the author anonymous by adding a new author called ‘Anonymous’ without modifying the entire database.
Conclusion
Managing your Shopify blog might appear overwhelming at first glance, but rest assured, it's entirely within your grasp. The act of removing an author is cumbersome with Shopify’s native functionality, but you have a great workaround in Bloggle. We hope that the above guide on how to remove author from Shopify blog is useful and has given you clarity on what is not a straightforward process at all.
FAQs
Can I remove the author but keep the date?
Yes. Replace the line {{ article.author }} with {{ date }} in your theme code to show only the publish date.
Will removing the author affect my SEO?
No. Google ranks content based on quality and relevance, not the author tag. Keeping high-value, optimized content ensures your rankings remain stable.
Can I undo this change later?
Absolutely. Simply reinsert {{ article.author }} into your theme files, and the author name will reappear on all blog posts.
Do I need to edit every post individually?
No. Once you remove the author code from your theme, the change applies automatically to all blog posts.
Can I import redirects through a CSV file with full URLs? Similarly, can I delete selected redirects in bulk?
Yes, absolutely. All you have to do is click import. You can find the tutorial here.


.svg)
