
.svg)
Introduction
Have you ever thought about teaming up your WordPress blog with your Shopify store? Imagine your blog, with all its rich content, becoming a part of your Shopify store. The idea of moving a blog to your Shopify site might seem daunting, but it’s more straightforward than you might think. This integration isn’t just about convenience; it’s a smart move for your SEO and customer engagement. We’re here to guide you through this process. Let’s explore how to bring your WordPress blog into your Shopify store and watch as your online presence grows stronger.
Why trust us
- We're the creators of Bloggle, a dynamic Shopify blog builder available on the Shopify App Store that fills the gaps in native Shopify blogging capabilities.
- We're a global force: 2000+ merchants across 60 countries have trusted us to amplify their voices.
- Your peers adore us: We have a stellar 4.9/5 rating on the app store.
- We've already empowered 55,000+ blogs written using our versatile app.
- Under our guidance, users have reported up to a 10x boost in Search Engine Optimization (SEO) traffic and revenue.
How to import WordPress blogs to Shopify
Method 1 - Via Shopify
The native Shopify import tool called ‘Transporter’ comes with very limited functionality. You can only import WordPress blogs in small batches. Often, the import is not accurate, meaning some important fields might slip through the cracks. Or worse still, some content might get imported with the wrong formatting. The worst part? The Transporter tool is only accessible by Shopify Plus merchants, so smaller Shopify stores need to find other ways to import WordPress blogs. All this is not great for beginners. Thankfully, there is a better way. Also if you're interested on the differences between Shopify & Shopify plus, make sure to check out our article.
Method 2 - Via Third-Party Apps (Matrixify)
Here is a step-by-step guide to importing your WordPress blogs to Shopify accurately:
Step 1
Install the ‘All Export’ plugin on your WordPress site. From the left-side-menu, go to ‘All Export > New Export’
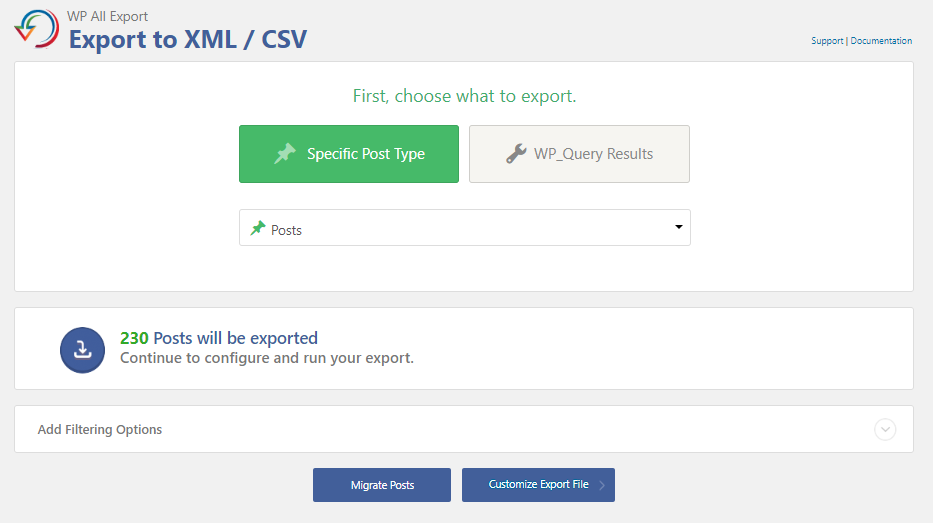
Step 2
Select “Post Type” as “Posts” from the dropdown menu and then click on “Customize Export File”
Step 3
Select the fields you want to export. For blog posts, the following fields are recommended:
- Standard – ID, Title, Content, Excerpt, Date, Permalink
- Media/Images – Alt Text, Featured
- Taxonomies – Categories, Tags
- Custom Fields – _yoast_wpseo_metadesc, _yoast_wpseo_title (Optional SEO fields from Yoast plugin)
- Other – Status, Author First Name, Author Last Name, Slug, Post Modified Date

Pro Tip: ‘Add All’ will export all fields but sometimes this can break the CSV file data, resulting in a corrupted CSV file output
Step 4
Wait for the Export process to finish. Once it’s completed, click on ‘CSV’ to download your WordPress blog in CSV format
Step 5
Rename the exported CSV file in a way that includes one of the following keywords - “WordPress” and “Posts” or “Pages“, for example, “WordPress-Blog-Posts.csv”
Pro Tip: Don’t open or edit the CSV file in Excel, because there’s a chance that the file structure gets broken which can hamper the import process
Step 6
Install Matrixify on your Shopify store. From the ‘Import’ section on your homepage, click ‘Add file’ and select your exported CSV file.
Once uploaded, make sure that it recognizes the file to be a ‘WordPress’ format
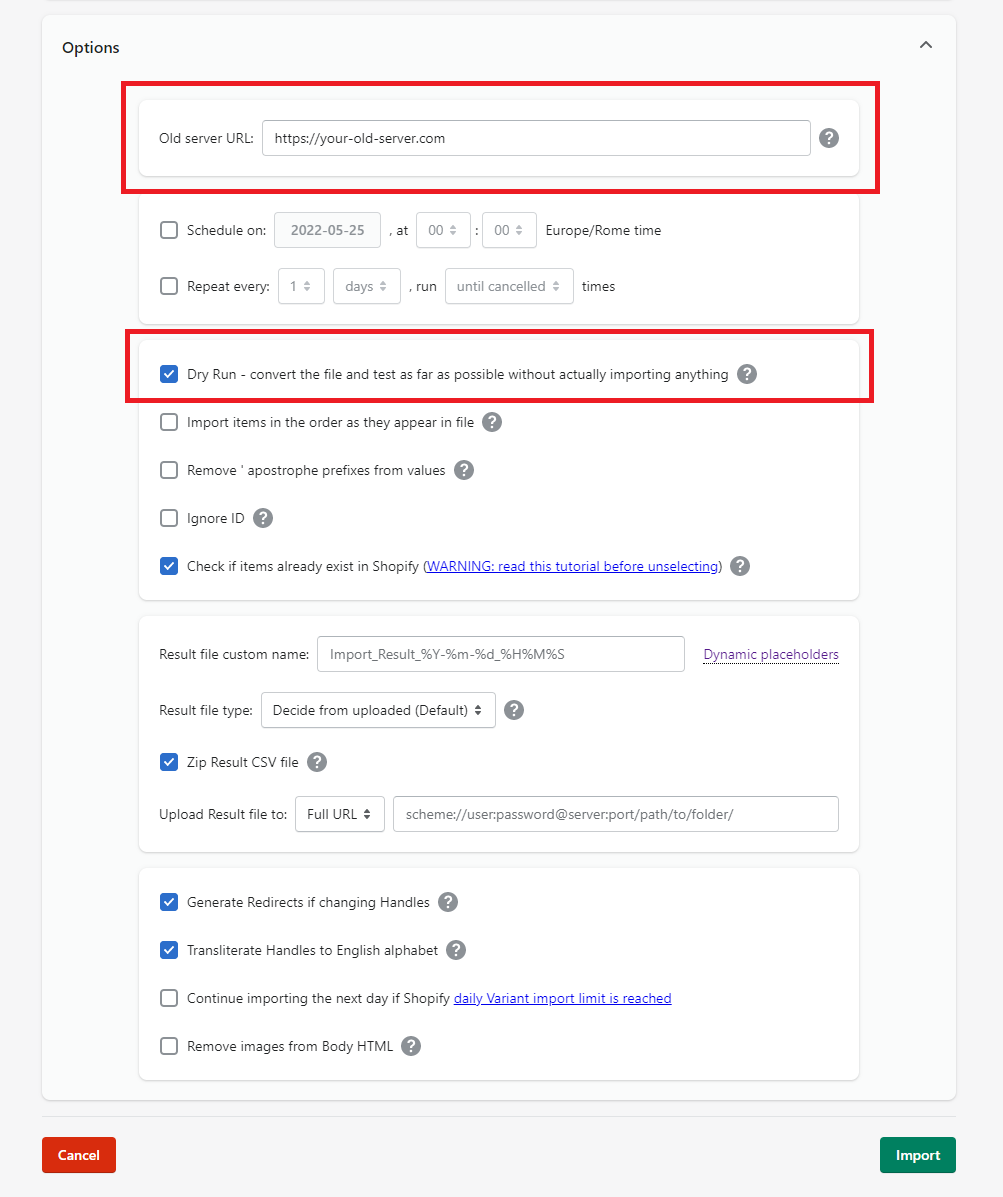
Step 7
Select import options. In the ‘Older Server URL’ field, enter the website’s domain that you see when logged in to the WordPress admin. Also, tick the ‘Dry Run’ checkbox. This will generate the Matrixify Excel template file which will be later used to import WordPress blog posts to Shopify. Hit ‘Import’ when done.
Step 8
After the import is complete, click on ‘Download Import Results’ to download the Matrixify Excel template (ZIP file) that you will upload to Shopify

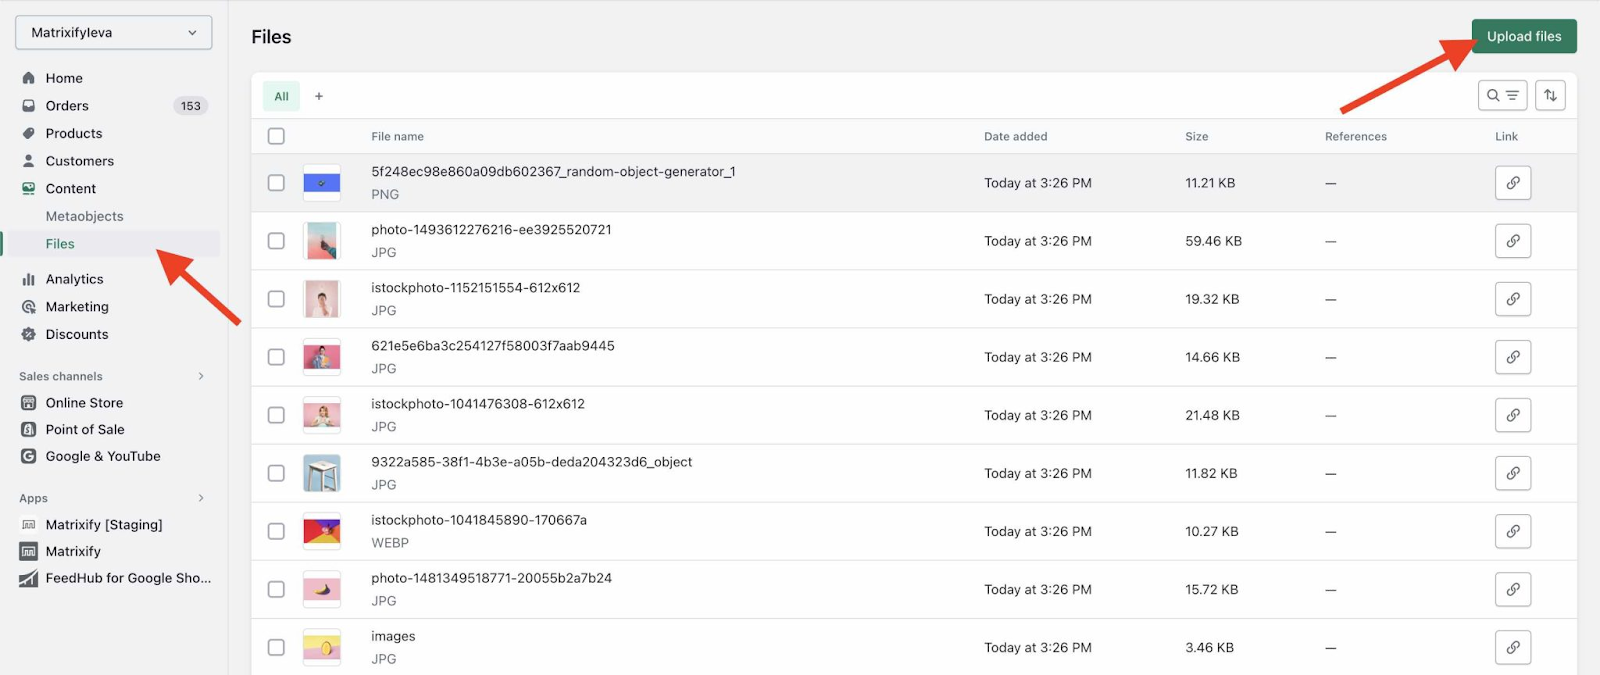
Step 9
Extract the ZIP contents and upload the ‘images’ folder to Shopify Files (Shopify Content > Files > Upload files). This will import all WordPress blog post images to your Shopify store
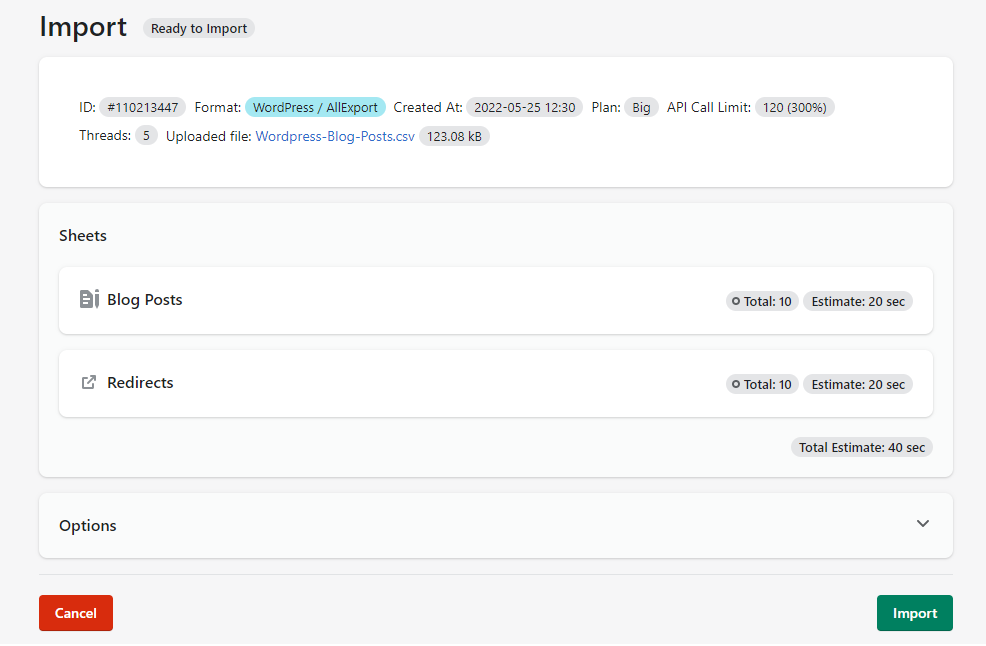
Step 10
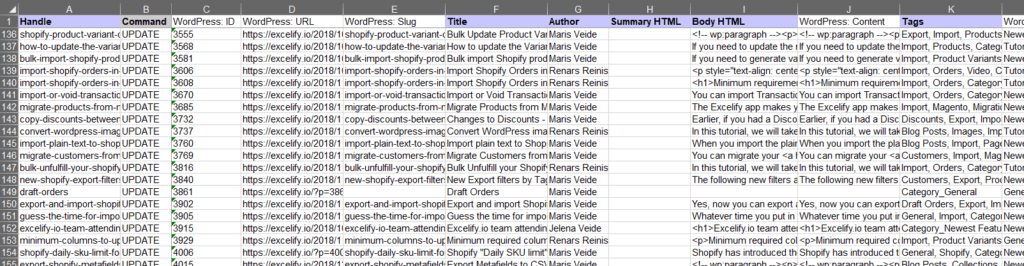
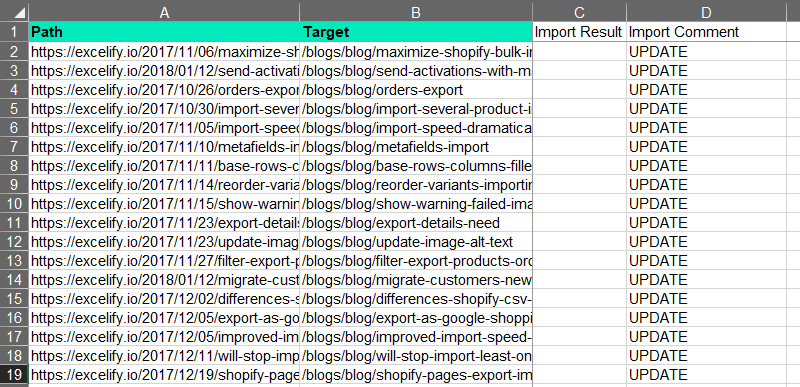
Check the Matrixify Excel template for any obvious errors and clean them up. Ideally, the Excel should contain 2 sheets - ‘Blog Posts’ and ‘Redirects’
Step 11
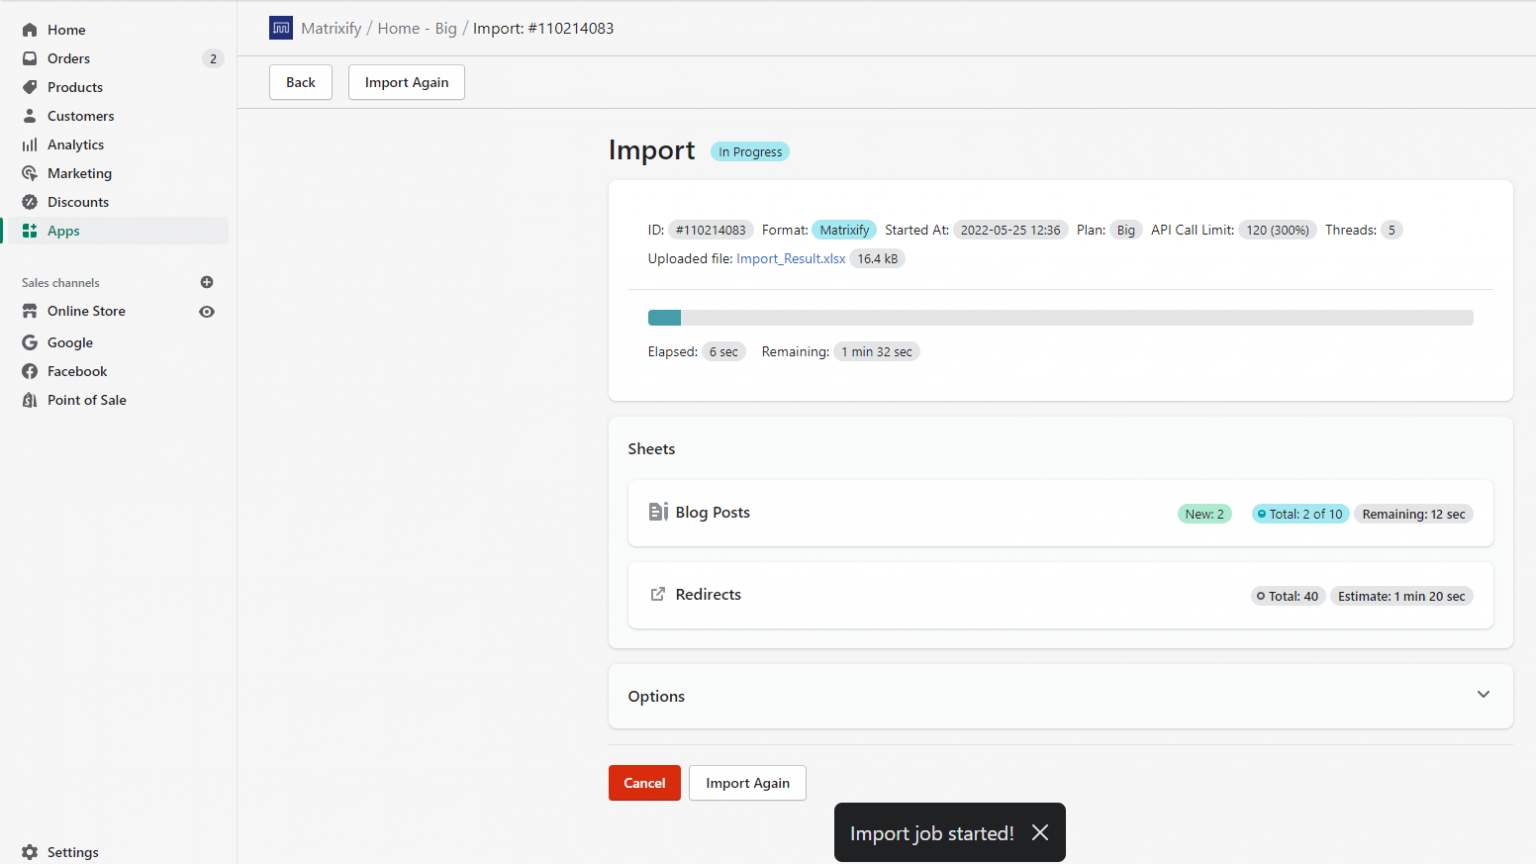
If you’re happy with the exported data, go to the Matrixify app and click on Import from the Import section. Don’t tick the ‘Dry Run’ checkbox as now you actually need to import all the data to Shopify
Step 12
Once the import job is complete, ‘Download Import Results’ and check if everything has been imported properly. The format should be ‘Matrixify’ and both the Blog Posts’ and ‘Redirects’ sheets should be visible. In case of any errors, refer to the ‘Import Comment’ column to understand the issue for that data, fix it, and reimport

Step 13
Voila! Your ‘Shopify import WordPress blog’ job is finished. Go to your Shopify admin panel, ‘Online Store > Blog posts’ to check your imported WordPress blogs.
Conclusion
And there we have it! We've journeyed through the ins and outs of importing your WordPress blog into your Shopify store. Whether you've gone the DIY route with Shopify's built-in tools, embraced the efficiency and enhanced user experience of third-party apps like Matrixify, or decided to let a seasoned web developer take the reins, the path to a more unified online presence is now laid out before you.
Remember, integrating your blog with your Shopify store isn't just about a seamless digital experience; it's a strategic move that can elevate your brand, enhance customer engagement, and consolidate your online efforts. By having your engaging blog content and stellar products in one place, you're not only streamlining your operations but also supercharging your SEO efforts.
Migrations can be tricky, but the outcome is well worth the effort. Your blog is more than just a collection of articles; it's the voice of your brand, the heart of your storytelling, and a vital part of your customer's journey.


.svg)
